Archive for the ‘Uncategorized’ Category.

rdesktopce issues

If rdesktopce has issues to connect to a Remote Desktop Server keep in mind that is only supported up to Windows Server 2008. Depending on your settings and the installed or not installed updates, rdesktopce may not be able to connect. I cannot fix this!

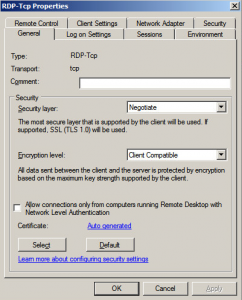
If rdesktopce connects to a Windows 2008 R2 server and shows only a desktop with blue background, try the following setting in Remote Desktop Session Host configuration:

Change “Security Layer:” to “Negotiate”

The same setting prevents rdesktopce to connect to a Windows 2012 R2 Server! Currently no solution for this issue.

FHEM: serielle Devices über Netzwerk anschliessen

Zu Testzwecken brauche ich ab und an neben meinen Haupt FHEM System ein zweites FHEM System, zB auf meinem Netbook. Nun sind drei Devices (nanoCUL 433MHz, nanoCUL 868MHz und ein Jeelink) direkt am Hauptserver über USB (serial) angeschlossen. Wenn ich diese in einem Testsystem benötige, müsste ich die Geräte vom Hauptserver trennen. Wie praktisch wäre es, wenn ich diese USB Devices über das Netzwerk anbinden könnte, so wie dies über EspLink mit dem angschlossenen Arduino Nano mit SignalDuino Firmware möglich ist.

Nun zur Anbindung von seriellen Geräten an das Netzwerk gibt es für Linux ser2net. Leider ist die Original-Version nicht multi-Client tauglich und würde nur einem Client die Verbindung erlauben. Bei EspLink sind jedoch mehrere Clients möglich. Obwohl die meisten ser2net Quellen nur einen Client unterstützen, gibt es ein oder zwei Quellen, deren Implementierung mehrer Clients unterstützen.

Nachdem ich einen Quellcode von ser2net mit multi-Client Support geladen und nach geringen Modifikationen auch erfolgreich implementieren konnte, kann ich nun alle Geräte, die am Haupt FHEM Server angeschlossen sind auch über mein Netzwerk nutzen. Die Geräte mussten nur in der ser2net conf Datei mit verschiedenen Netzwerkports eingetragen werden:

2301:raw:0:/dev/serial/by-id/usb-FTDI_FT232R_USB_UART_A9YDLRJV-if00-port0:38400,8DATABITS,NONE,1STOPBIT
2302:raw:0:/dev/serial/by-id/usb-FTDI_FT232R_USB_UART_A94BBD91-if00-port0:38400,8DATABITS,NONE,1STOPBIT

In der fhem.cfg wurden die Geräte entsprechend umdefiniert:

#define nanoCUL433 CUL /dev/serial/by-id/usb-FTDI_FT232R_USB_UART_A9YDLRJV-if00-port0@38400 1234
define nanoCUL433 CUL 192.168.0.40:2301 1234
#define nanoCUL868 CUL /dev/serial/by-id/usb-FTDI_FT232R_USB_UART_A94BBD91-if00-port0@38400 3421
define nanoCUL868 CUL 192.168.0.40:2302 4321

Die original EspLink Anbindung des Arduino Nano mit SignalDuino Firmware:

define sduinoIP SIGNALduino 192.168.0.99:23

Mit diesen Änderungen kann ich diese USB Geräte nun auch über das Netzwerk benutzen.

Meine Abwandlung von ser2net findet sich auf Github.
Brother MFC-235C and phpSANE plus Scan-to-eMail etc.

I had some challenge to get phpSANE to work with the flatbed scanner of my MFC-235C.

Although phpSANE should create a scanner ini file with the available settings of the scanner, this does not work out of the box with a simple install of phpSANE. To get the available settings of the sanner, scanimage -L is used. Using this manually reveals which SANE features are supported by the scanner:

Options specific to device `net:localhost:brother2:bus5;dev1':
  Mode:
    --mode Black & White|Gray[Error Diffusion]|True Gray|24bit Color [24bit Color]
        Select the scan mode
    --resolution 100|150|200|300|400|600|1200|2400|4800|9600dpi [200]
        Sets the resolution of the scanned image.
    --source FlatBed [FlatBed]
        Selects the scan source (such as a document-feeder).
    --brightness -50..50% (in steps of 1) [inactive]
        Controls the brightness of the acquired image.
    --contrast -50..50% (in steps of 1) [inactive]
        Controls the contrast of the acquired image.
  Geometry:
    -l 0..215.9mm (in steps of 0.0999908) [0]
        Top-left x position of scan area.
    -t 0..355.6mm (in steps of 0.0999908) [0]
        Top-left y position of scan area.
    -x 0..215.9mm (in steps of 0.0999908) [215.88]
        Width of scan-area.
    -y 0..355.6mm (in steps of 0.0999908) [355.567]
        Height of scan-area.

But most of these values are not recognized by phpSANE. So I hardcoded some of the features directly in the phpSANE code.

Fixes and changes

  • Missing directories (output, scanners, tmp), incorrect permissions prevented phpSane to create a scanner ini for the scanner.
  • The Mode selection list was not filled as phpSane expects the special mode names Gray, Color and Lineart. I hard coded the mode_list and changed security.php to allow spaces, [, ] and &
  • The pnm output of the scanimage command for the brother is corrupted. I added a pipe into pamfixtrunc in the cmd used to generate files or preview (scan.php)
  • changed config.php to meet the scanners features. I.e. the lowest res supported is 100 and not 75.
  • although scanimage says the scanner supports brightness and contrast, phpSane was unable to read the correct values. I hardcoded brightness and contrast default, min and max values (0,-50, 50).

See my code at https://github.com/hjgode/phpSANE

brscan-skey

I was unable to get the scripts provided to work with my Linux Debian installation, so I just coded some new scripts and replaced the original ones.

Here is my scan-to-email script (scantoemail-0.2.4-1.sh) using sendEmail package:

#!/bin/sh
FILENAME="/tmp/$(date "+%Y-%m-%d_%H-%M-%S").jpg"
SENDTO='nameofreceiptient@mail.com'
SCANCMD="/usr/bin/scanimage -d 'brother2:bus5;dev1' --mode 'True Gray' --resolution 150dpi -l 5mm -x 210mm -y 297mm | /usr/bin/pamfixtrunc | /usr/bin/pnmtojpeg > "$FILENAME
SENDEMAIL="/usr/bin/sendEmail -f 'yournamel@mail.com' -t "${SENDTO}" -u 'Scanned to email' -m 'Im Anhang das gescannte Dokument' -a "$FILENAME" -s 'smtp.gmail.com:587' -xu 'yourname@gmail.com' -xp 'yourepassword' -o tls=auto -o message-charset=utf-8"
eval ${SCANCMD}
eval ${SENDEMAIL}
exit 0

Fix corrupted pnm output of scanimage

Unfortunately the pnm out put of scanimage is corrupted with the MFC-235 bu can be fixed on-the-fly with the use of pamfixtrunc. This was used in my scan-to-email replacement and in my phpSANE setup.

Mobile Development: Subclass foreign Window using injectDLL

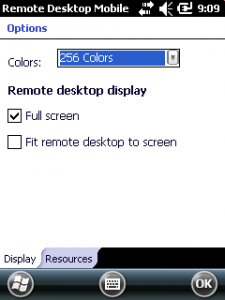
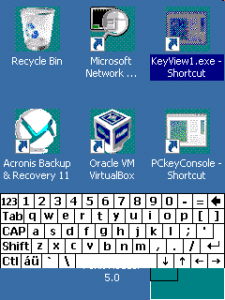
Recently we needed to show and hide the SIP (Software Input Panel) inside a full screen Remote Desktop Mobile session.

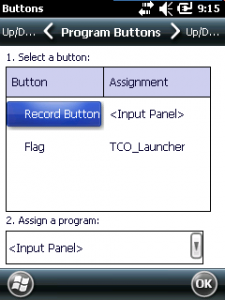
The first challenge is to control the SIP without having a menu bar with the SIP symbol inside. To get this working you can assign a hardware keyboard button, it must be an App button, to show the SIP. See Settings>Personal>Buttons and assign “<Input Panel>” to the hardware key.

app_button_to_input_panel RDM_fullscreen_option RDM_fullscreen RDM_fullscreen_with_SIP

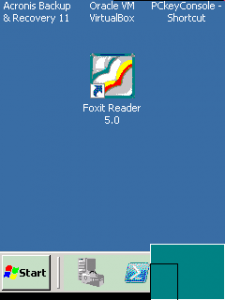
Unfortunately the SIP will be hidden immediately after being shown if RDM is started with Full Screen option.

Continue reading ‘Mobile Development: Subclass foreign Window using injectDLL’ »